Sequence a Sensitive Renovation
Unlike modern drywall construction, heritage cottage restoration is governed by chemistry, seasons, and statutory lead times. Lime mortar cannot be applied externally in winter frosts, bat surveys can only take place during active summer months, and thick stone walls require months to release trapped moisture once cement render is removed. Use this six-phase sequence to prevent expensive rework.
The Six-Phase Cottage Renovation Sequence
Phase 1: Investigation, Monitoring & Emergency Holding Repairs
Clear choked gutters, fit temporary tarpaulins over slipped roof valleys, and remove soil piled against outer walls. Simultaneously, commission a conservation building survey, drainage CCTV inspection, and ecological preliminary roost assessment. Do not strip historic plaster or joinery during this phase.
Phase 2: Heritage Statements, Statutory Consents & Trade Tendering
If the cottage is listed or altering external appearance in a conservation area, prepare a Heritage Impact Statement and Schedule of Works for Listed Building Consent. Use the determination period (typically eight to twelve weeks) to book specialist lime masons and heritage roofers, who often book six months ahead for the spring-to-autumn lime season.
Phase 3: Roof Overhaul, Chimney Masonry & Perimeter Drainage
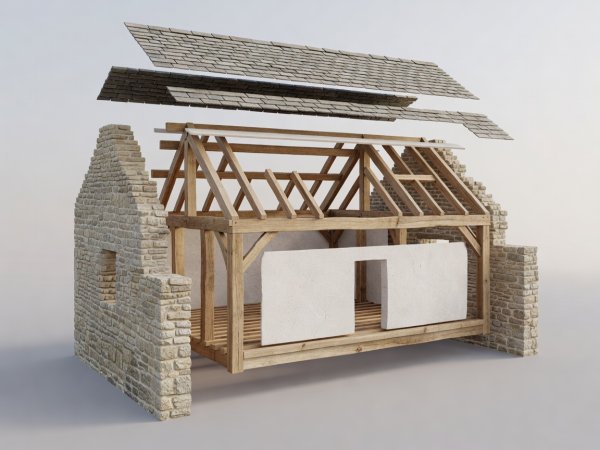
While scaffolding is erected, complete all high-level chimney repointing, lead valley renewals, slate or tile salvaging, and cast-iron rainwater goods installation. Lower external ground levels and install ventilated French drains or evaporation trenches around the base of the walls.
Phase 4: Cement Removal, Structural Carpentry & Drying Pause
Carefully hack off incompatible cement renders or gypsum plaster from damp internal walls. Repair decayed beam bearings, sole plates, and window sills. Allow the exposed masonry to breathe and dry naturally with background ventilation before sealing it behind new finishes (a rule of thumb is one month of drying per 25mm of saturated wall depth).
Phase 5: First-Fix Services & Breathable Internal Lime Plastering
Route electrical cables and heating pipes through floor voids or discrete service ducts without chasing deep slots into rubble walls. Apply three-coat haired lime plaster or capillary-active wood-fibre internal insulation bedded entirely in lime adhesive—never dot-and-dabbed with air gaps behind.
Phase 6: Second-Fix Joinery, Limewash & Commissioning
Refit conserved floorboards, ironmongery, and secondary glazing. Decorate new lime plaster exclusively with vapour-permeable limewash, silicate mineral paint, or breathable clay paint so the entire wall assembly continues to regulate indoor humidity effortlessly.
Why Seasonal Timing Governs Lime and Ecology
Attempting external lime repointing or lime rendering between November and March in northern European climates is one of the commonest causes of project failure. Water held within fresh lime mortar expands if it freezes before carbonation is complete, turning the surface into friable powder by spring.
Similarly, if your roof repairs require an ecological emergence survey for bats, ecologists can only conduct those dusk and dawn surveys between May and September. Missing the summer survey window can delay roof stripping by an entire calendar year. Mapping these fixed seasonal gates at the very start of your planning keeps contractors productive on internal joinery and non-weather-critical tasks during winter.
Hold a 20% to 25% Unallocated Contingency: Even with thorough non-invasive surveys, opening up a concealed lintel or lifting a modern hardboard floor covering frequently reveals localized timber decay or unbonded masonry. Keep at least twenty percent of your construction budget ring-fenced for structural fabric repairs before ordering bespoke kitchens or sanitaryware.